Truck Upgrade

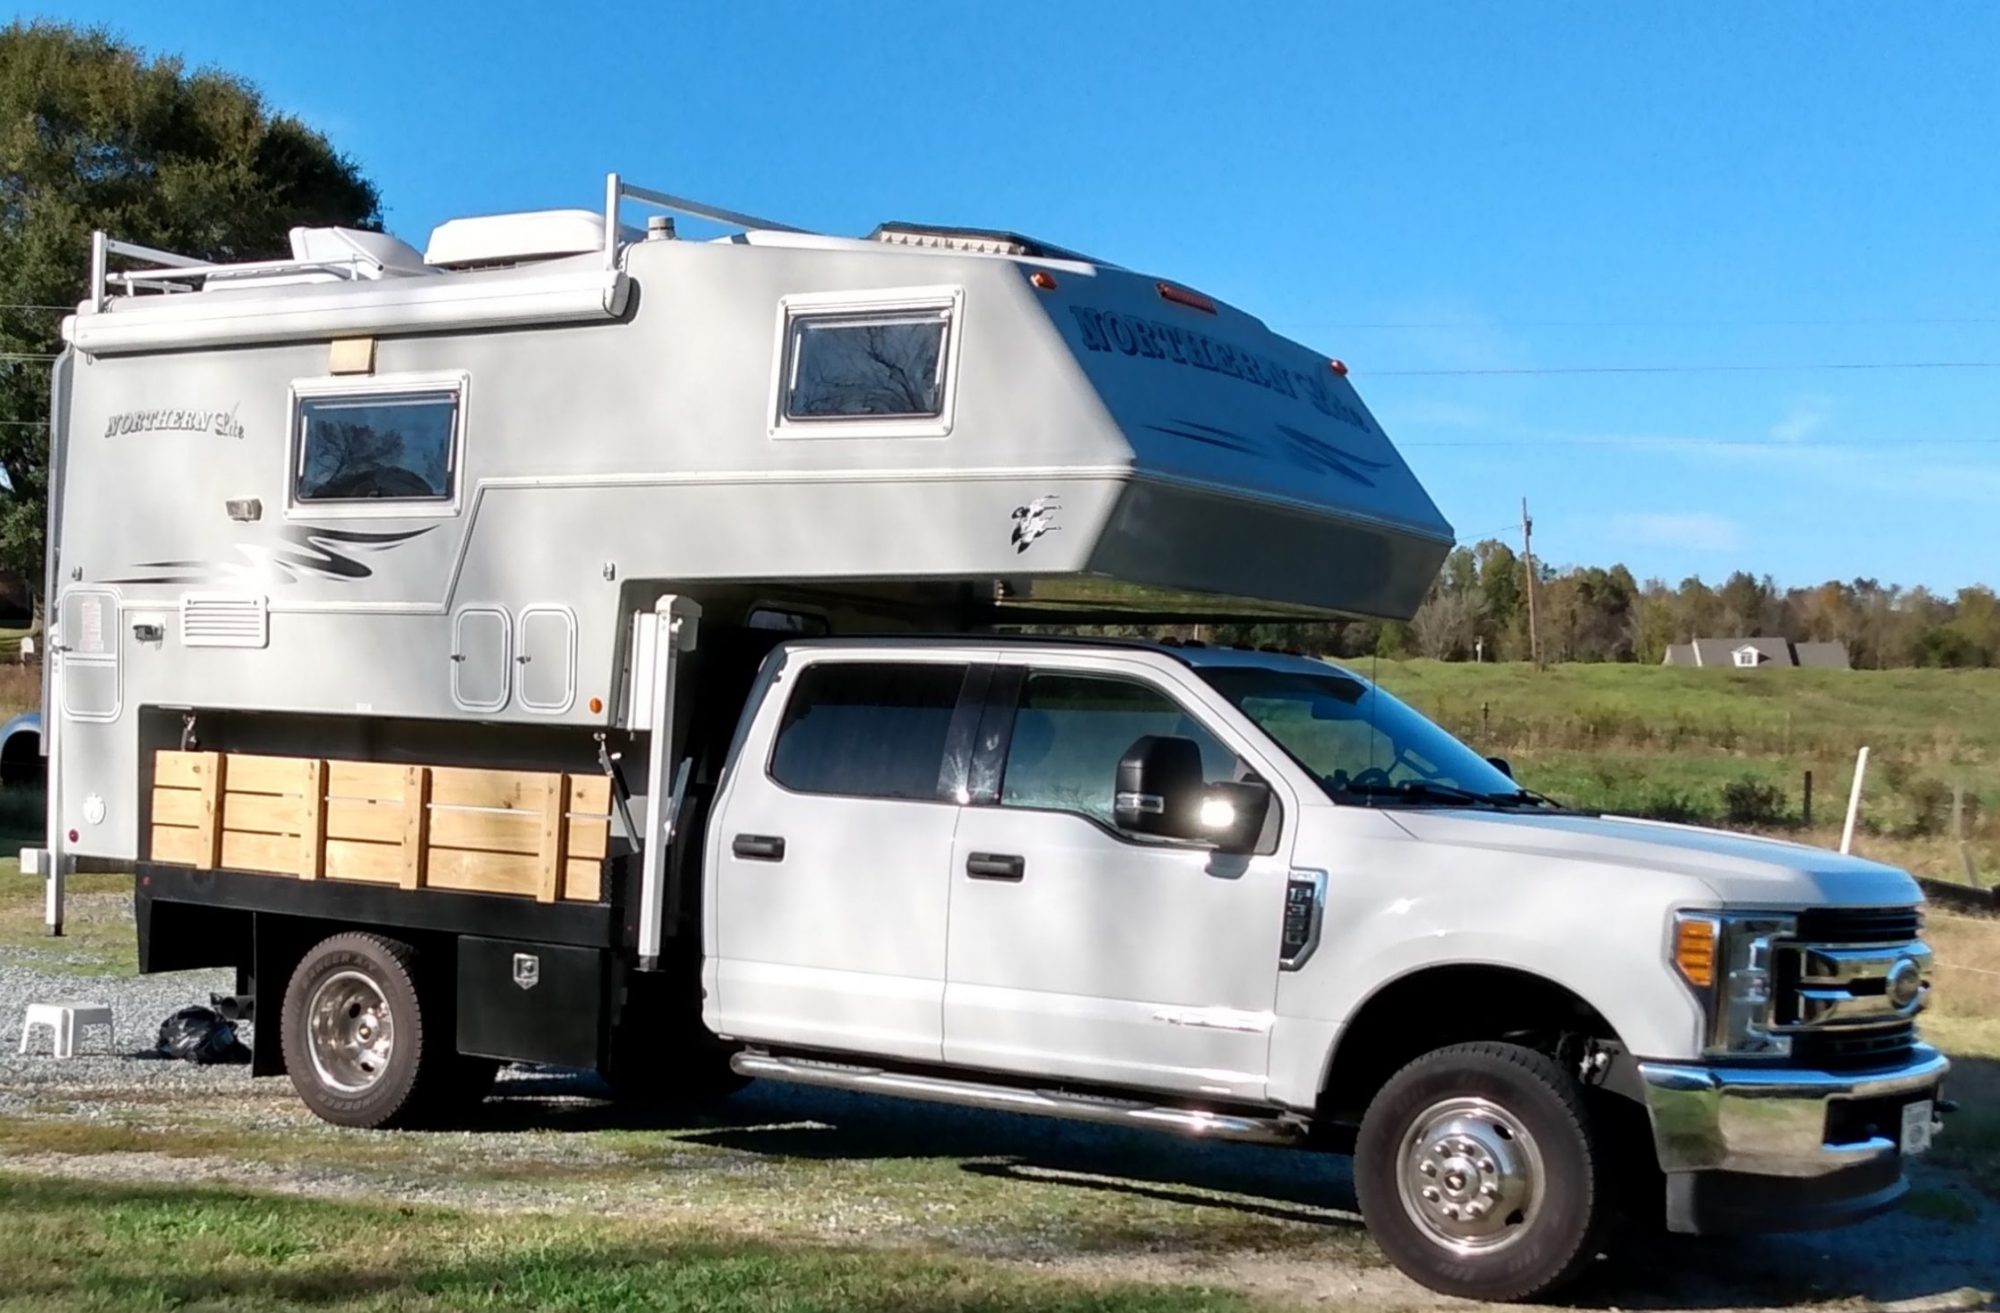
We recently upgraded the truck from a ’15 Ram 3500 SRW pickup to a ’17 F-350 DRW flatbed. We did this for a couple of reasons. First, we were slightly over the gross RAWR for the RAM when fully loaded and we have ideas for additional “things” that would be nice to take along, but would put us further to the backside of the weight scale. Second, while the roads in our immediate area (within two days drive) are all in pretty good condition, we would like to venture to other parts of the country where, from experience, we know there are pot-holes that could swallow us alive, so the more rubber, springs and capacity we have the more comfortable we will be.

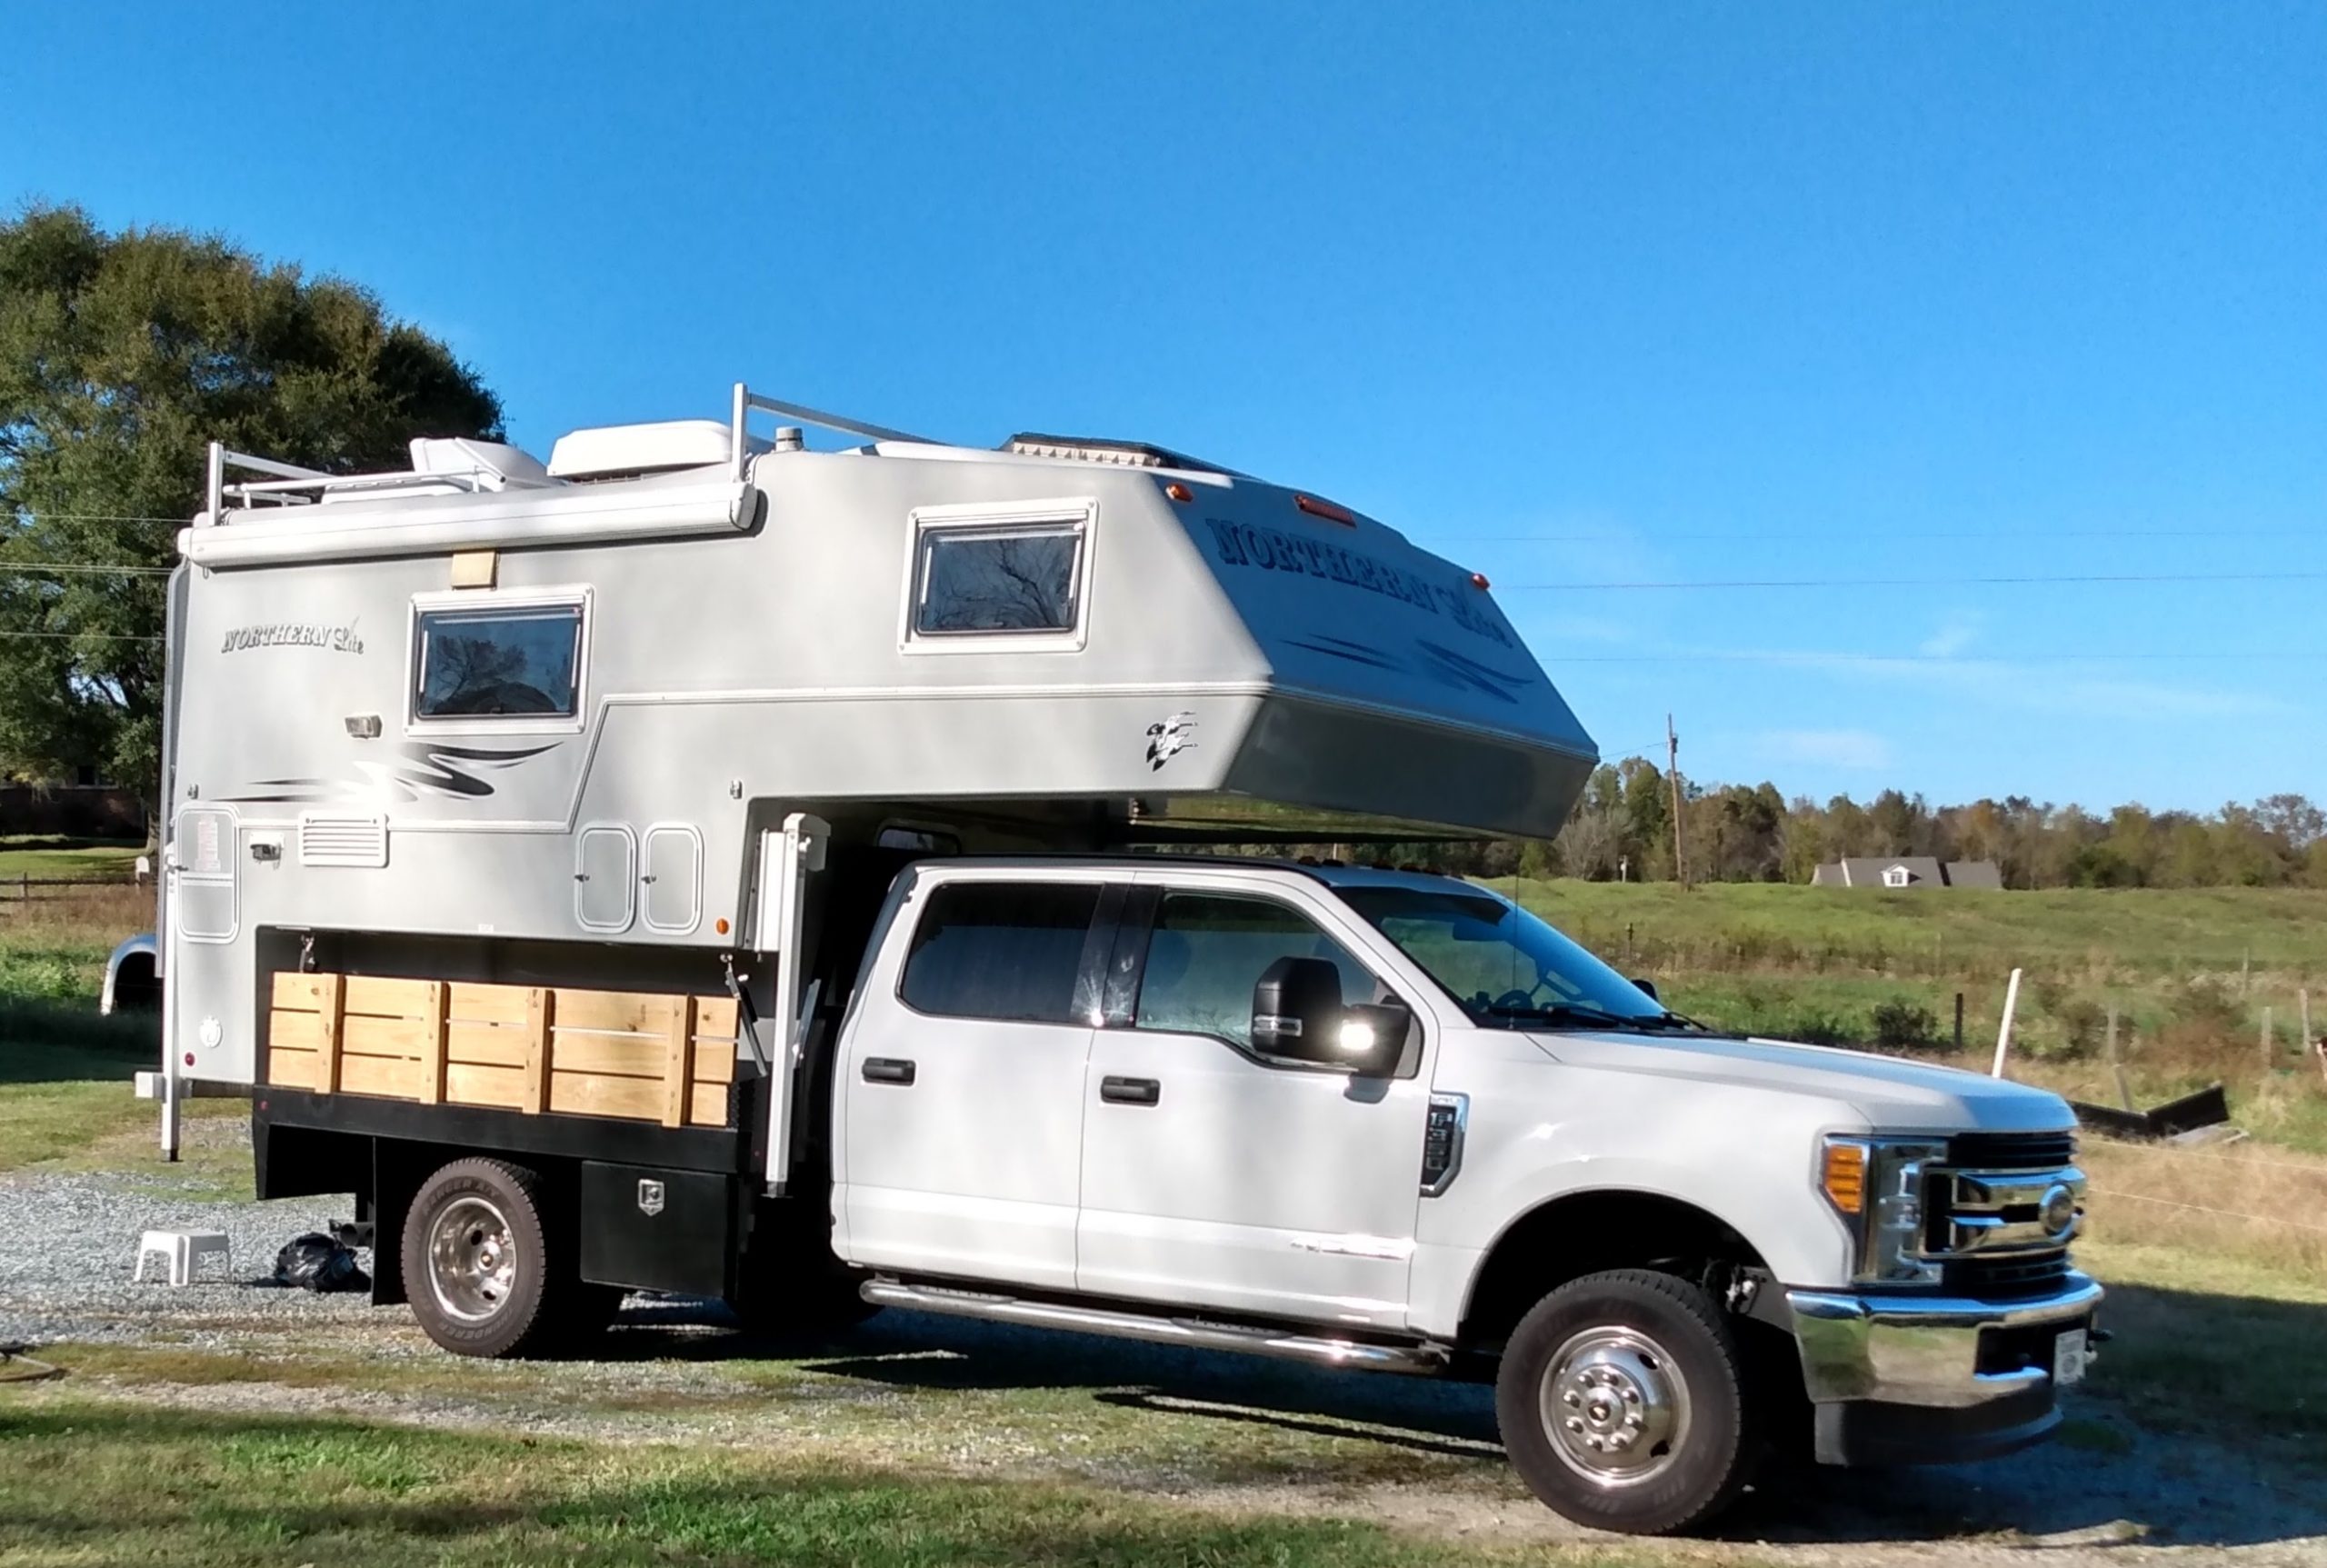
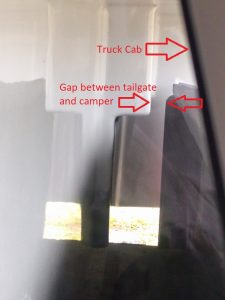
We found this truck at a local dealer, who was accommodating enough to let us test drive it to the house where we raised the camper, backed it under and made sure our parking lot measurements were actually going to work. Thankfully, they did and it fit without issue. This is a F-350 chassis cab (as Ford refers to it), with the 14k gvw option and a diamond plate flatbed with flush mount fifth wheel ball. The door sticker shows a gross FAWR of 5600 and gross RAWR of 10040. The dealer also let us spin through the local CAT scales where we discovered our empty steer axle weight is 5060 and drive axle weight of 4080.

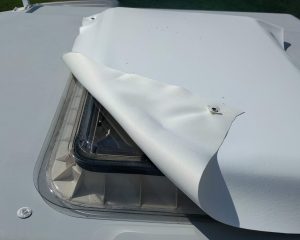
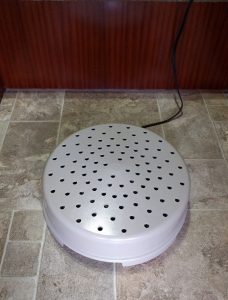
The camper is sitting on a double layer stall mat which provides a cushion soft, non-skid/slip area as well as raises the camper 1.5″ which we wanted to do for roof/headache rack clearance as well as bed siderail clearance.

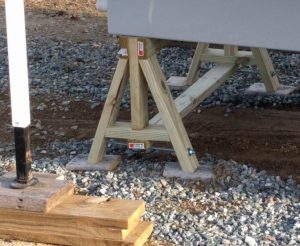
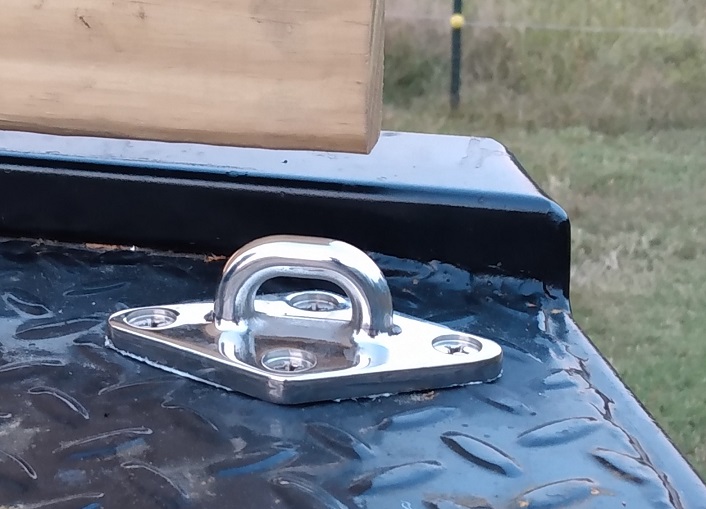
For tiedowns we are using our Torklift Fastguns from the RAM, but we cut off the threaded rod to allow for maximum shortening so we can fasten to flatbed deck. For the rears we installed two marine padeyes that are thru bolted with backing plates and for the fronts we drilled a 3/4″ hole in the flatbed gusset.


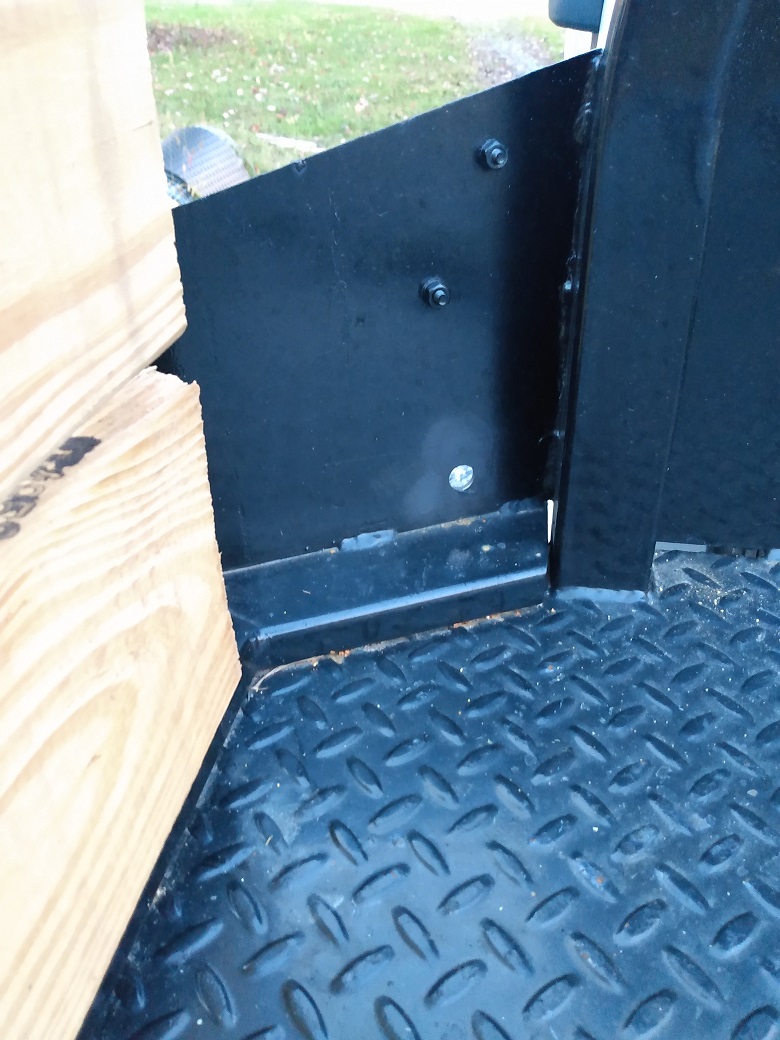
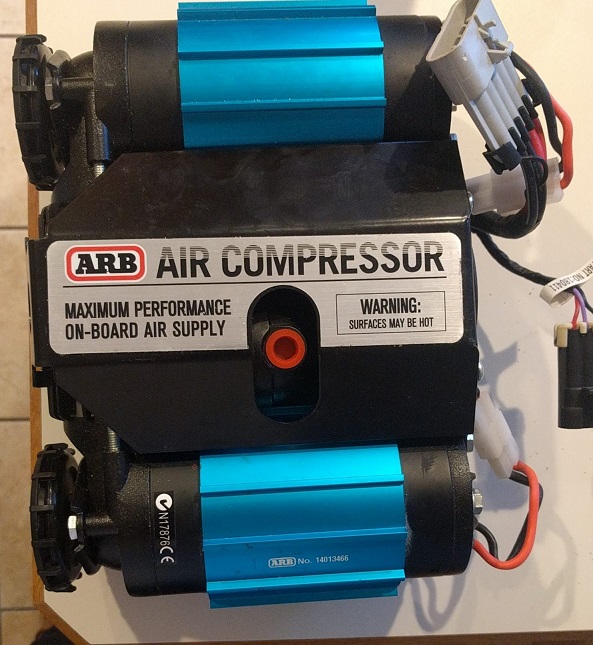
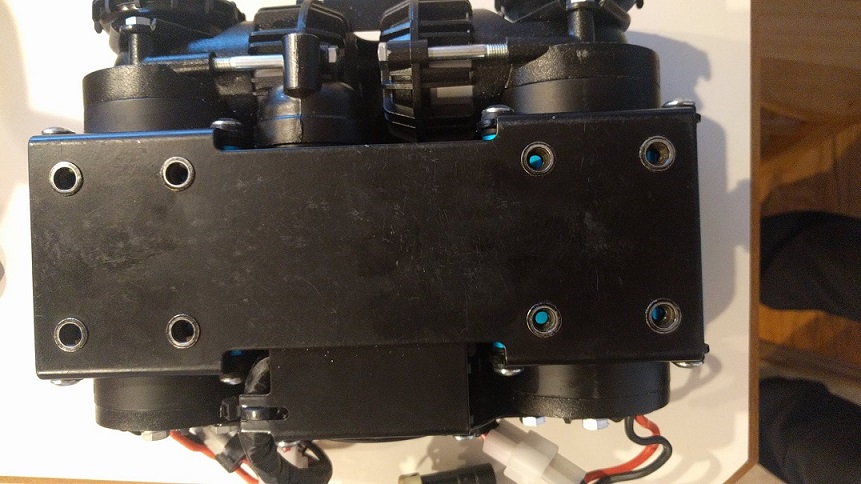
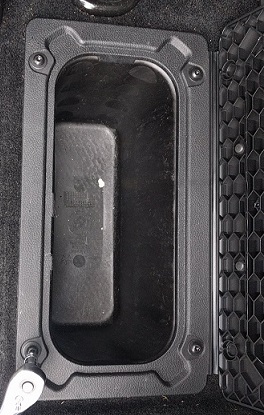
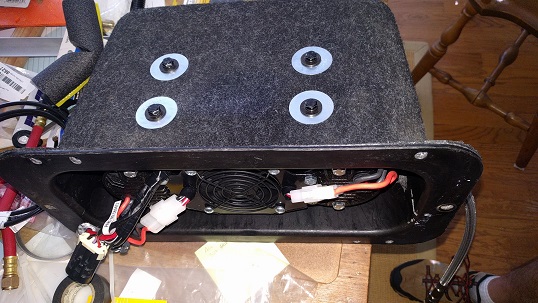
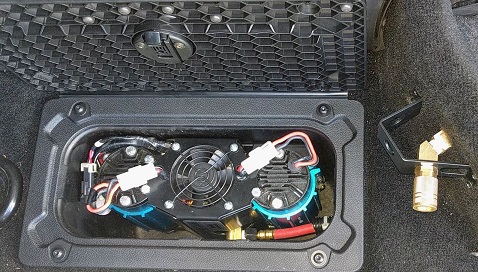
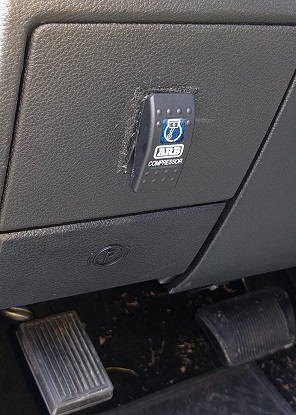
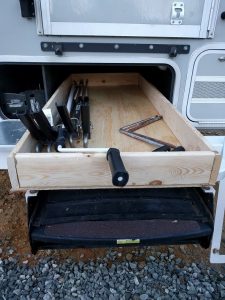
We also transferred our ARB air compressor from the RAM to a toolbox. It was nice to have this mounted in the cab of the RAM, but the Ford doesn’t offer the same in-floor storage so the toolbox was best option. A nice feature of the Ford is the upfitter switches. There are 6 toggle switches in the cieling of the cab all pre-wired to an easily accessible fuse box with wires in the engine compartment.

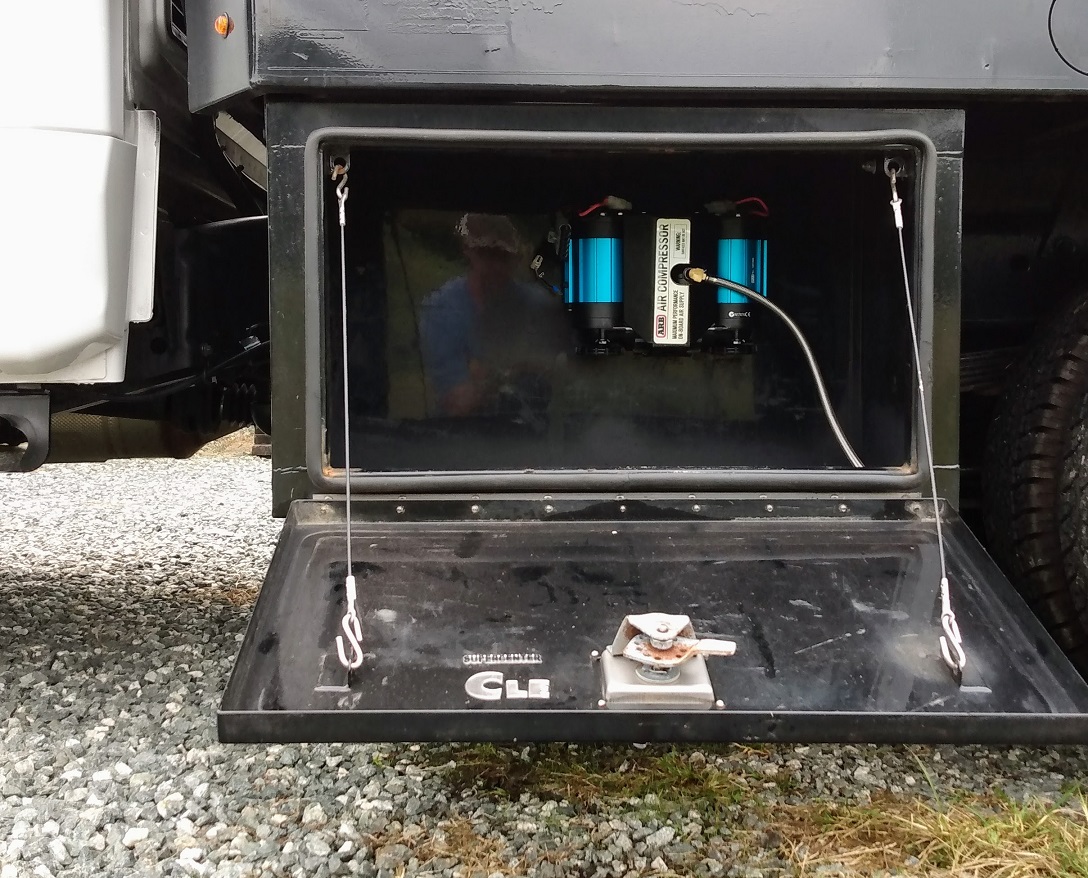
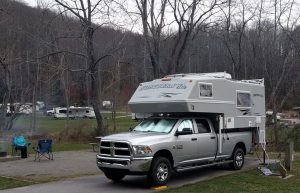
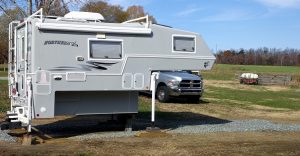
One thing we both miss about the RAM is the Cummins engine brake. While the Ford does have an active engine brake, it makes non of the ‘jake brake’ type noise when de-accelerating. Oh well. We did a maiden voyage with the new truck a couple weekends ago to the Asheville area of North Carolina. We took the back roads heading west which meant slow, switchback type driving with uphill grades that felt like we were gaining a truck length in altitude for every truck length of progress. Then heading east we took the interstate and tested out the ‘quiet’ jake brake. It all seemed to work as designed in that it kept us at a steady 45mph with no brake or accel required. We stayed at a couple of Harvest Hosts where one seemed to be having a Mercedes camper van rally that we were invading (there were two more to left of us in the pict below). Wonderful folks and great food.


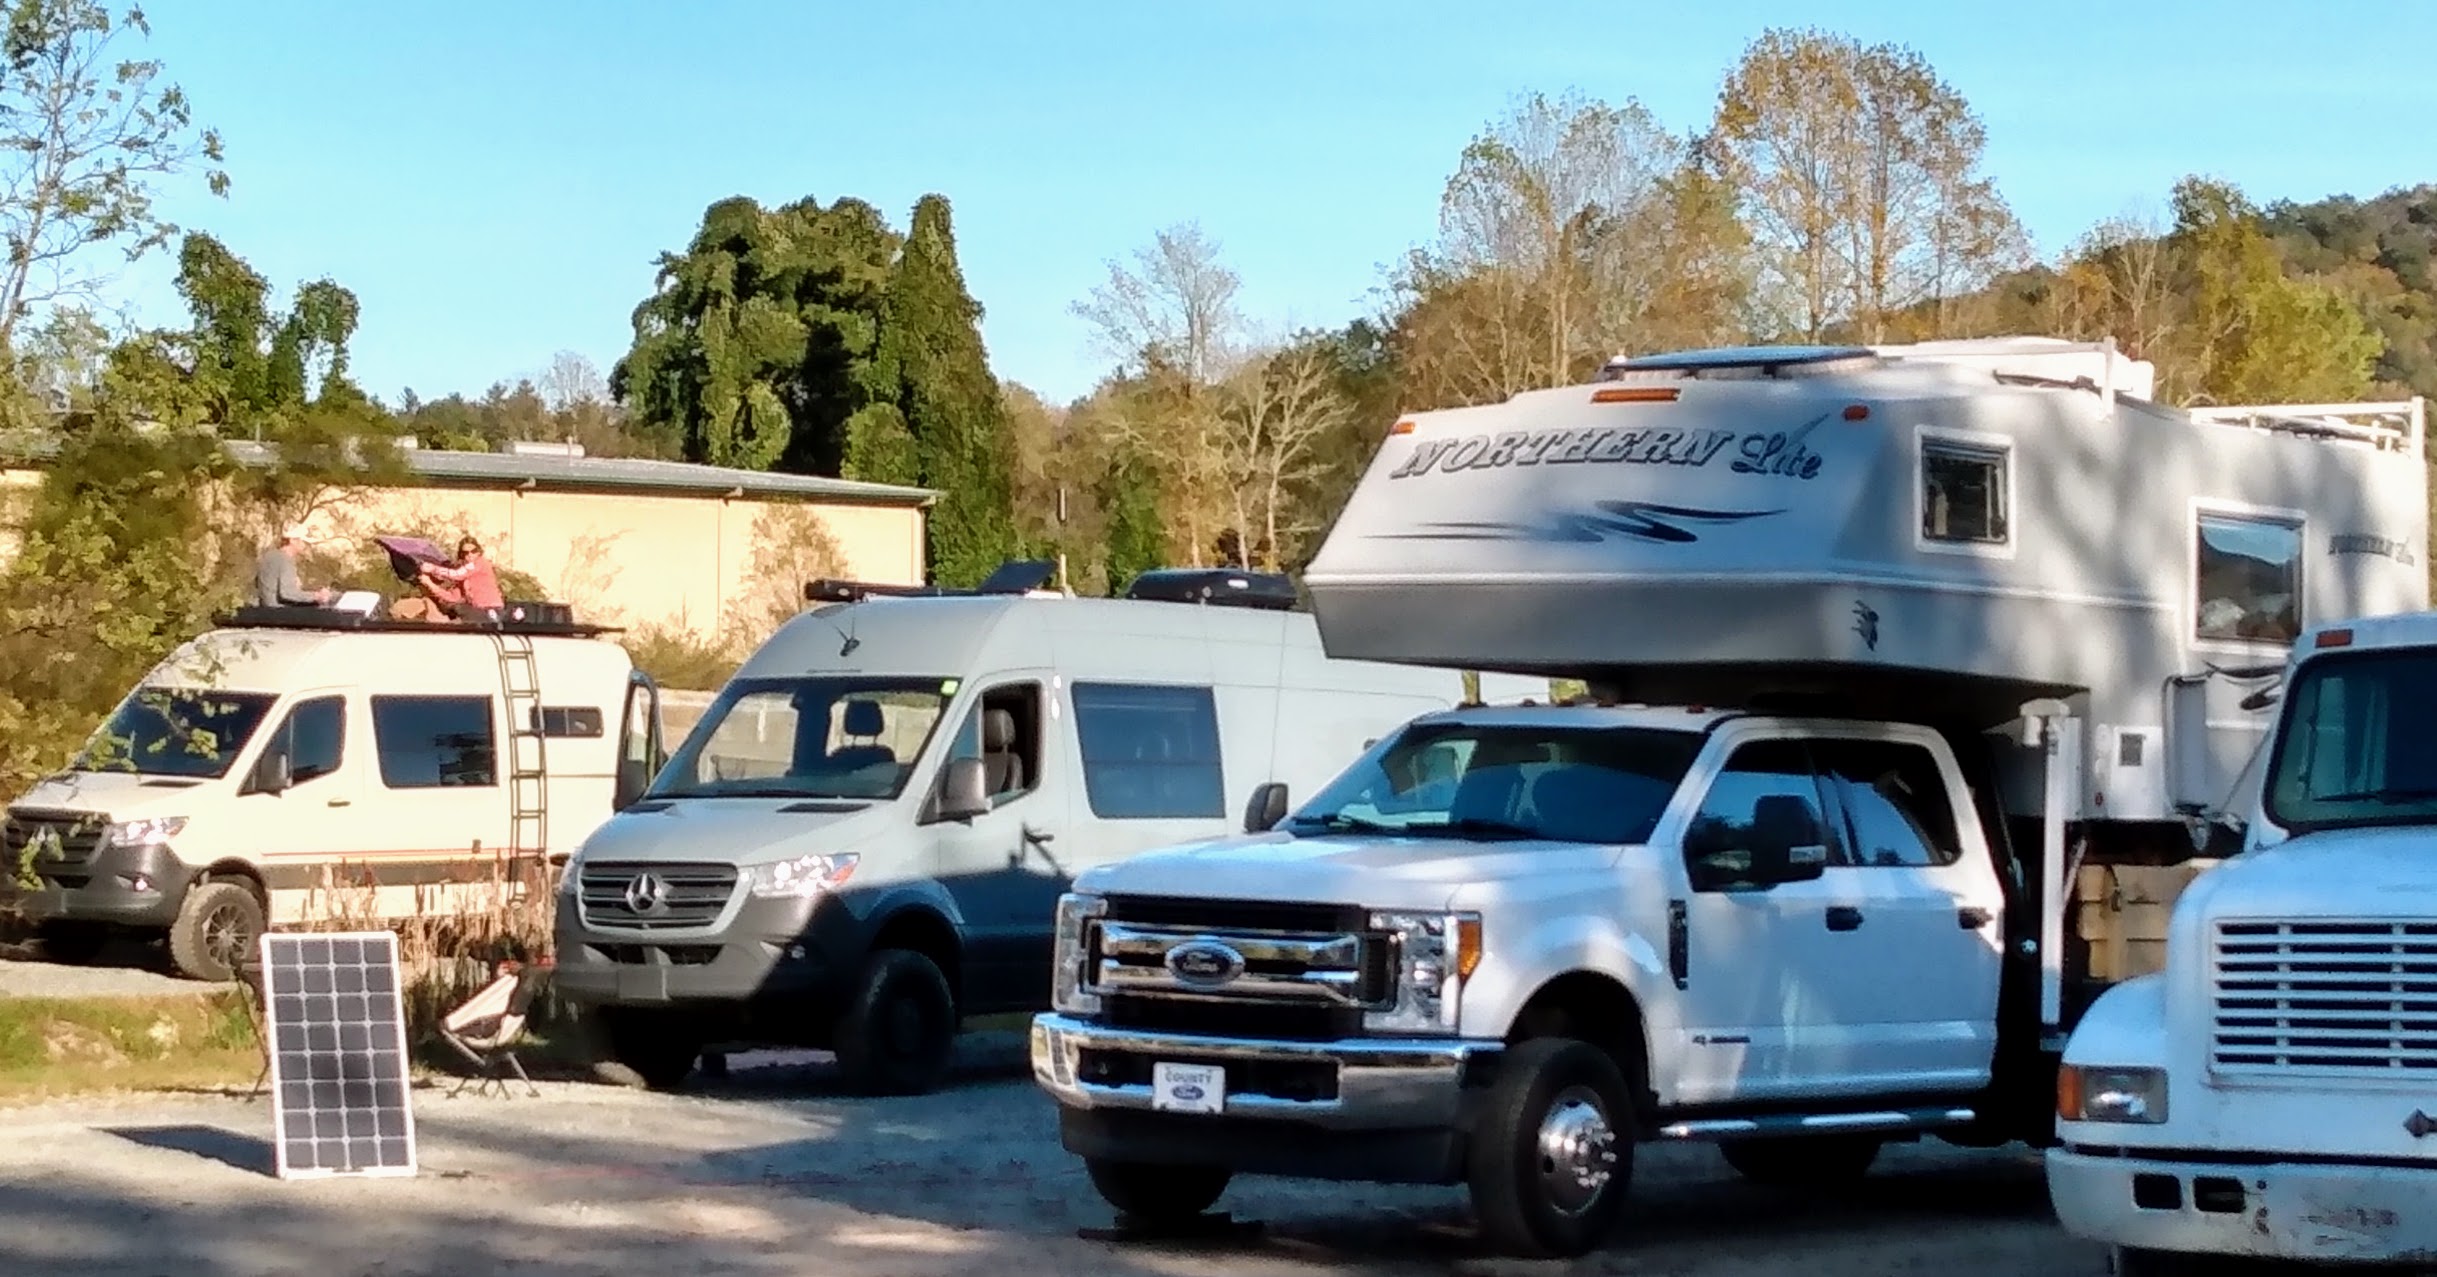
All in all a marvelous inaugural trip for the new unit.

Arb Compressor Installation

One of the desires for the Goose is to go beach camping. A long time ago, in a previous life, we used to live on an island. In fact, the part of the island we lived on was also an island connected by a thin stretch of beach. There was a small ferry boat that could handle 4 cars at a time that was the main method of egress. If the ferry wasn’t running we could opt to traverse the beach. Never a problem, but always an adventure. For those who have never driven on a beach, there are two major rules to follow. 1) Stay in the tracks of those before you and 2) Air down your tires. Number Two is the most important. Without airing down tires, even the best of the best four wheel drives will be challenged. While some may be able to make it work, there will be lasting damage done to the drive train if the tires are not deflated.

There is an obvious issue that one runs into when airing down for any reason. When you are done, the asphalt is brutal on soft tires and you never know how far the nearest air station will be. Throw a camper on top and there’s no telling what will happen. So, before we entertain the idea of beach travels, we’ve been researching airing up options.

After much research, we had narrowed down our choices to a couple of options, but thought a friend may have some additional input. Low and behold, after a quick discussion it turned out our dear friend had an Arb twin cylinder air compressor along with wiring harness looking for a home. So our decision was made and Arb it would be. Here is the unit that arrived several days later.


That was the first part of the puzzle. The next hurdle…where to put it. Now, with the Ram, you’d think there would be some available real estate inside the massive engine box. Ha! Not an iota to space. So over to the interwebs search tools to see if anyone else had done this. Bingo…..

https://www.cumminsforum.com/forum/2013-2018-general-discussion/2135482-arb-ckmta12-twin-air-compressor-mounting-location.html

We really hadn’t used the floor compartments for much, so this was a perfect solution. Not to mention the idea of mounting to the underside of the chasis seemed a bit daunting.
Here is the Ram floor storage box. There is one behind both front seats.
RAM floor storage box
After many dry fits and trials, the end game started to come into focus. One difference between the posters installation and ours is we mounted it with the electronic connections up and the air intakes down. The caveat is that we bolted the unit 3/4″ off the bottom of the box. The reason for this was we didn’t like the idea of the unit sitting on its connections and if they were down, they would be very difficult to access. Here is the Arb bolted into the Ram floor storage box.

RAM Storage Box with ARB bolted in
Once that was figured out, we put two 3/4″ holes in the rear of the box, toward the top. One for the air hose and one for wiring. At one point, we had a rubber leader hose coming off the pump, but thinking about how hot other compressors get and experiencing several popped hoses due to excessive heat, we switched to a 24″ metal braided leader hose. We don’t have pictures for this, but the leader hose exit the floor storage box and goes directly up through a conveniently located access hole under the rear seat (thank you Dodge) which then comes through the carpet to the bracket and fitting shown below.


The Arb kit also came with a cabin switch. Thankfully, the Ram dashboard had a nice square plate just above the Ebrake release that had enough real estate to house the toggle without much effort. As for the wiring harnesses (two of them), the only modifications we had to do was lengthen the power and ground wires in the main harness. This was done by making a 10′ harness with 10awg wire and patching it in to the existing harness.

We haven’t done much testing yet but like what we’ve seen so far. The unit has a cutoff that shuts the compressor off at ~150psi. There is a fan that runs to help keep the unit cool (more likely to dissipate heat vs keeping cool). We do keep the compartment open while it is running to improve air flow (and help with heat). We’ll do some low to high inflation testing in the near future and update the post.

Portable Solar

We struggled with the choice of solar. Permanent roof top or portable. There are pros and cons to both. What finally dawned on us was that most of our overnight spots have been in the shade so roof top would not be as effective. Also, roof top is almost never at an optimal angle to take full advantage of the panel(s). This led us to searching for portable solar panel stands and of course the internet was very obliging.
We ended up with a BougeRV 100W flexible panel, a Zamp sidewall port, 30A fuse and Renogy Adventurer 30A solar controller.

TBC

Stone Mountain State Park, Roaring Gap, NC

The maiden voyage of the Goose was to Stone Mountain State Park in Roaring Gap, North Carolina. The campground was full and the weather was perfect. This being the first outing, we were both a bit on edge about how it would all work, but systems performed as expected, so any concern was for naught.

Stone Mountain provides several hiking trails of varying difficulty. We had some past history with the “tough” trail, but after some deliberation, decided to try it again. We spent four or so hours wandering the trails and had a wonderful experience.

Lessons Learned:
1. Beware of new metal – We discovered **new** serrated knives from Wally World are in fact sharp enough to dice a finger!! All was good, but it did emphasize the need to carry a stocked first aid kit and not be too anxious to get the hors d‘oeuvre out on the table!

2. Make lists and USE them – There is nothing like getting 30 miles from base and realizing life sustaining meds are back at the ranch. That added an hour, but was obviously well worth the detour. Make a list and USE IT!

3. Face your daemons – The last visit to Stone Mountain proved to be the initial discovery of the necessity of the above mentioned life sustaining meds. During that visit, we had no clue how close we came to creating a serious medical calamity, thus, this visit was a reincarnation and also a mental challenge to overcome what had previously defeated us. We met the challenge and overcame with room to spare.


UV Protection for plexiglass windows

This idea came from a poster on the Northern Liter Truck Camper Facebook page. To protect the plexiglass windows, use SNADS and marine canvas. The Snads are snaps with VHB (3m Very High Bond) double stick on the backs. This avoids any external skin penetration and provides a small footprint, solid anchor. The marine canvas and snaps came from JoAnn’s Fabrics. A total of 3 yards was used.  The blue painters tape is a way to eliminate any flapping in the breeze.

Northern Lite – Drawer Rails

Most likely due to vibrations from road travel, the back drawer supports on a couple of the drawers had failed.  This is an easy fix with a flash light and square head screw driver. The only gotcha ordering these online is to make sure the items ordered are the correct vertical size.

Basement Storage

For those not familiar, the Northern Lite 10-2 (2012) has a 5′ deep, 21″ wide, 13″ tall basement (unfortunately the door height is 8.5″ so there is a bit of a tradeoff). In fact, once behind the generator compartment, the basement widens out an additional 6″. Unfortunately, that space becomes somewhat lost, since it is difficult to get to.
In order to be able to get to and store items down here, the newer models do have plastic mold trays. Ours did not. Instead, we fabricated a very light drawer out of 1×4 firring strips and a 1/8″ piece of pine plywood. This was put together with SS screws and liquid nails. It is 21″ wide and 48″ deep. So when fully inserted, there will still be a 12″ space for extraneous items.


Humidity Control

One of the challenges storing a closed unit outside with no climate control is humidity. This can cause all sorts of issues that are better off to be avoided in the first place. It is fortunate that the Northern-Lite 10-2 is close enough to allow a 110VAC cord to the unit to allow all the 110 outlets to function throughout the off season.

To combat the humidity, we have a Davis 1458 Air Dryr 1000 (from Walmart) plugged in and running 24/7 along with the usual Damp-Rid hanging bags. These two items, along with an occasional Glade air freshener keep things hospitable while the unit is closed up.

Unloading & Loading

Unloading:
The necessity of a flat pad did not hit home until the first attempt at unloading the Northern-Lite 10-2 (or any TC for that matter).

The original area used had about 6″ front to back and 4″ left to right slopes. We did manage to get the TC off, leveled and lowered, but will avoid that much slope in the future. There is way too much room for error and equipment (human) stress/failure.

Since then, the pad has been graded level (maybe slight back to front slope to assist drainage) and a sprinkling of left-over gravel thrown on top.  The plan is to grade down the pad and fill in with a couple inches of gravel all around. This will keep the summer growth down and allow better drainage (until a permanent roof can be applied!)

Update: Just finished heavy duty saw-horses for the TC to rest on.

Loading:
This process was not as streamlined as it could be. As many folks have mentioned, the ability to get the units lined up with each other is an acquired one that will come with practice. A crew cab truck adds to the challenge. Ultimately, patience, eyeballs and keeping calm prevail and the camper fits nice and snug (3/4″ to spare on each side). We haven’t done this enough to make any grand suggestions on how to make this a sure fired success the first time.

UPDATE:
We may have discovered the secret sauce to loading the camper. By dropping the driver side seat back all the way and the driver turning around to the left, there is a very narrow sight line out the back window that allows for the entire left side of the camper and pick up bed to be seen (without mirror) and lined up. Once generally lined up, we were able to back under the first try with very little gee and hawing. Below is a site picture looking over the driver left shoulder. Keeping the gap less than 2″ assures clearance on the opposite side.

Winterizing the water system

Winterize Water System – This is the first go at winterizing the water system in the Northern-Lite 10-2. 

  1. Open Grey, Black tank drains – leave open
  2. Water pump OFF & faucets closed
  3. Drain fresh water tank (after each use)
  4. Open hot & cold low water drains
  5. Drain hot water tank
    1. Remove nylon plug and release pressure valve
    2. Replace when done
    3. Leave pressure release open ?????
  6. Close low point drains
  7. Set hot water tank bypass
    1. Close cold supply
    2. Close hot supply
    3. Open bypass valve
  8. Close fresh water tank supply to water pump
  9. Attach antifreeze supply hose to water pump and open valve
  10. Water pump ON
  11. Open faucets one at a time until pink shows
    1. Kitchen hot & cold, bath hot & cold, inside shower hot & cold, outside shower hot & cold, toilet
  12. Water pump OFF
  13. Pour some antifreeze into drains to fill traps
    1. Kitchen, bath sink and shower
  14. Open faucets to relieve pressure.
  15. Crack low-point drains to antifreeze down there

Main valves. Access via outside door. Shows low point drains shut and tank supply on.

Hot Water Tank under settee – valves shown in bypass mode just prior to antifreeze being added to system.